How to Draw a Golden Retriever with Pastel Pencils Using the Grid Method
Share
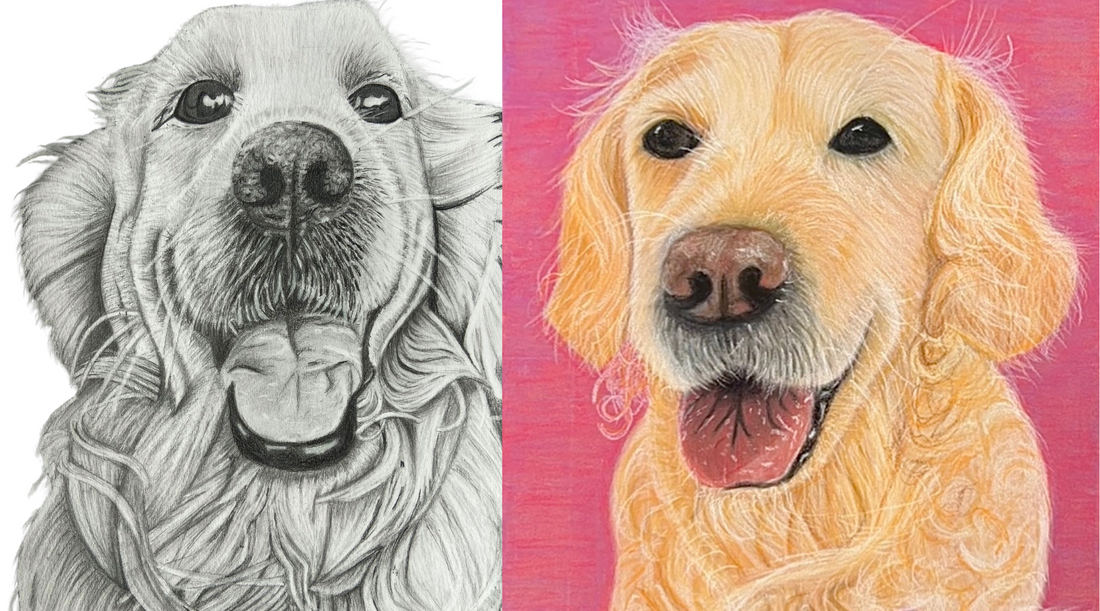
Golden Retrievers are one of the most beloved dog breeds, known for their fluffy coats, kind eyes, and friendly demeanour. If you’re an artist looking to capture their charm in pastel pencils, follow this step-by-step guide using the grid method to ensure accuracy and proportion.
Materials You’ll Need:
-
Pastel pencils (warm golden and tan hues, plus black and white for details)
-
Toned pastel paper or sanded paper
-
Eraser
-
Ruler
-
Grid overlay (printed or drawn lightly in pencil)
-
Blending tools (blending stumps etc)
Step 1: Prepare Your Grid and Reference Image
Choose a high-quality reference image of a Golden Retriever. Using a ruler, divide both your reference image and drawing paper into equal squares. I use Canva to create the exact dimensions I need and then put the downloaded image onto the Grid# app.Then lightly draw the grid on your paper using a pastel pencil or light graphite pencil to avoid pressing too hard.
Step 2: Outline the Basic Shapes and Proportions
Using the grid as a guide, start by sketching the basic structure of the Golden Retriever. Focus on transferring the main shapes square by square to maintain accuracy. Use light pencil strokes to outline the head, snout, ears, and body. I find it helpful to focus on the negative space - this can help you to get out of the "drawing what it should look like" phase.
Step 3: Define the Facial Features
Once the basic outline is complete, refine the head by adding details. Draw the eyes, ensuring you capture highlights for a lifelike appearance. Sketch the nose with soft, rounded edges and add the mouth with slight curves to give the dog a friendly and gentle expression.
Step 4: Block in the Base Colours
Using pastel pencils, begin applying the base colours. I usually block in the darkest colours of the eyes and nose first. Then work into the light golden tones for the fur, using soft strokes to layer colours. Apply a darker brown for shadowed areas and white or cream for highlights. Avoid pressing too hard—build up layers gradually.
Step 5: Add in the Basic Background
I then starting blocking out background. General colours and shapes, without going into too much detail.
Step 6: Add Fur Texture and Depth
To create realistic fur, use short, directional strokes following the natural flow of the Retriever’s coat. Around the ears and chest, use slightly wavier strokes to reflect the thick fur texture. Blend gently using a cotton swab or blending stump to soften transitions while maintaining fur definition.
Step 7: Refine the Background
Work back into the background and add in as much detail as possible.
Step 8: Refine the Features and Add Detail
At this point, it can be helpful to step away from the drawing for at least a couple of hours. Darken the eyes, nose, and mouth with deep brown and black pastel pencils. Add fine fur details around the eyes and muzzle using a sharp pastel pencil to lift highlights. For extra depth, layer different shades of gold and brown, making subtle adjustments to capture realism.
Step 7: Final Touches
Once you’re satisfied with the drawing, go over any areas that need refining, enhancing highlights and deepening shadows where needed. Step back and assess your drawing, making final adjustments for a polished look.
Conclusion
Using the grid method with pastel pencils makes drawing a Golden Retriever more manageable and accurate. With patience and practice, you’ll be able to create a lifelike and expressive portrait of this lovable breed. Keep refining your technique, experiment with colours, and enjoy bringing your artwork to life!
Get in touch if you've got any questions - here!